A sump is a separate tank, usually placed in the cabinet beneath your display tank, that handles filtration, equipment placement, and provides additional water volume. Common in saltwater (essentially universal in serious reef systems), increasingly popular in larger freshwater setups. Here's the complete guide to what sumps do, when they make sense, and how to set one up.
At a glance: do you want one?
| Yes, if... | No, if... |
|---|---|
| The tank is large or heavily stocked, and a canister is straining | It is a small or modest community tank — a properly sized filter does the job |
| You want the equipment out of the display | You rent, or the tank can't be drilled, and a hang-on overflow doesn't appeal |
| You are running saltwater or a reef, where skimmers and reactors need somewhere to live | You want simplicity — a sump adds plumbing, a return pump and a failure mode |
| You value the extra water volume for stability | The budget is tight — the cost is well above a canister |
A sump is not an upgrade every tank wants. It is the right answer to specific problems — capacity, equipment, volume — and an unnecessary complication otherwise.
What a Sump Actually Does
A sump is more than just "filtration in a different place." It serves multiple functions:
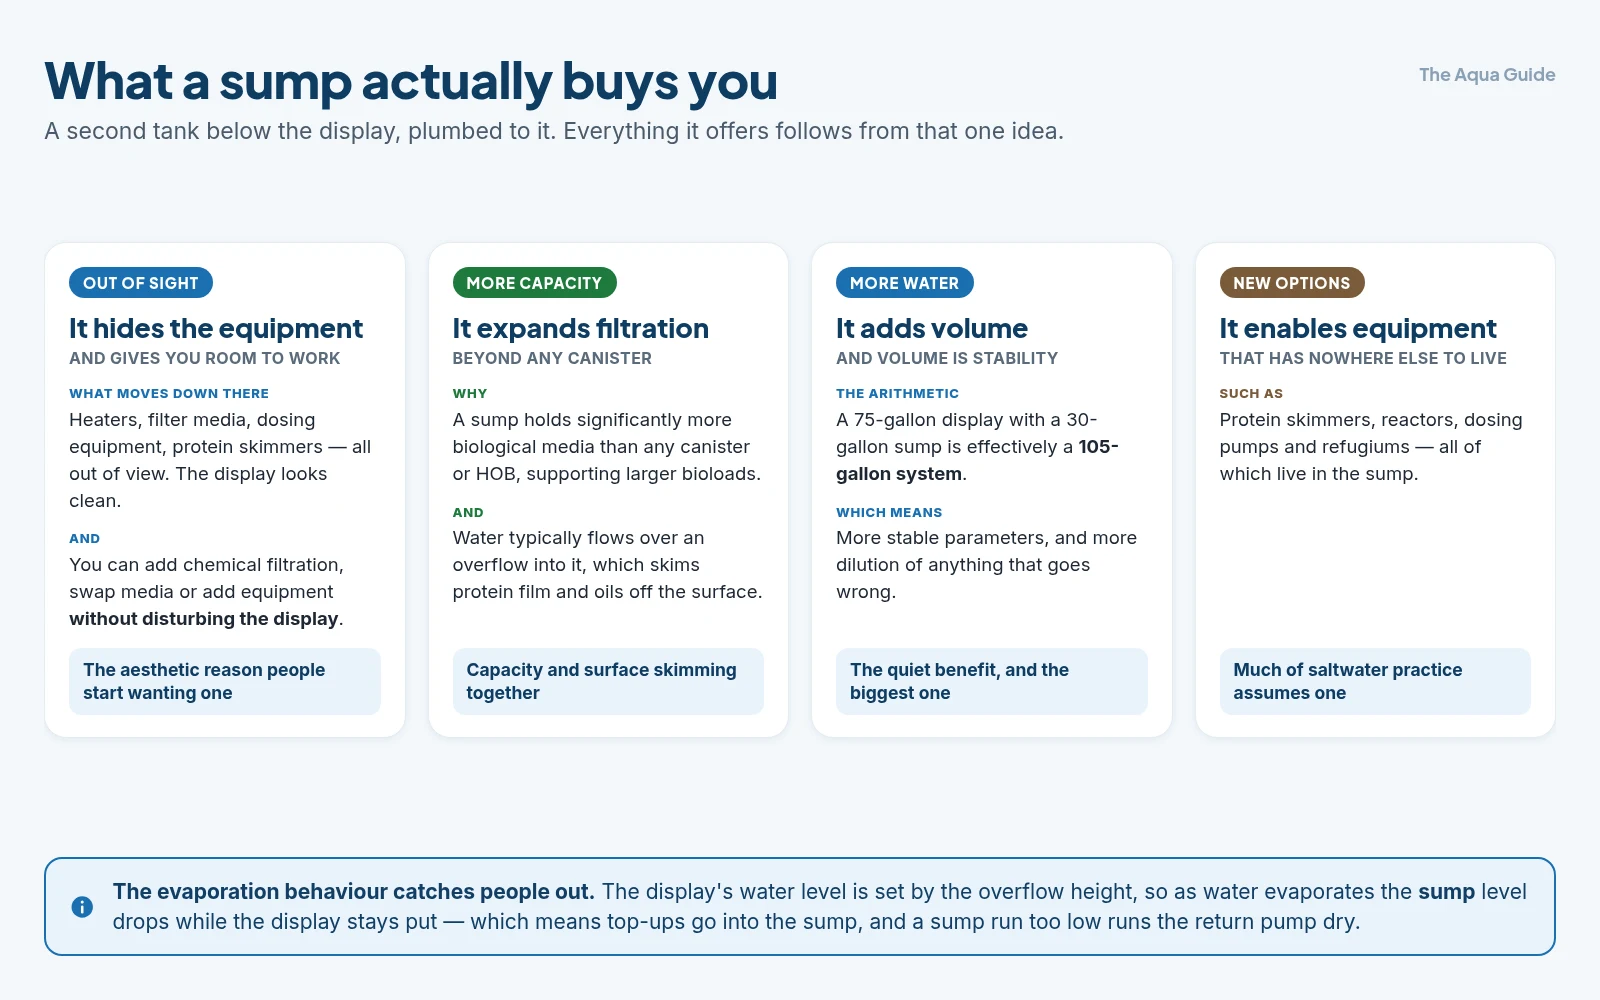
Hides equipment. Heaters, filter media, dosing equipment, protein skimmers — all live in the sump, out of view. The display tank looks clean and uncluttered.
Expands biological filtration. A sump can hold significantly more biological media than any canister or HOB filter, supporting larger bioloads.
Adds water volume. A 75-gallon display with a 30-gallon sump effectively becomes a 105-gallon system — more stable parameters, more dilution of waste.
Provides workspace. Easy to add chemical filtration, swap media, add equipment without disturbing the display.
Enables advanced equipment. Protein skimmers, reactors, dosing pumps, refugiums — all live in the sump.
Improves surface skimming. Water typically flows over an overflow into the sump, removing protein film and oils at the surface.
How a Sump System Works
The basic flow:
1. Water flows from the display tank into the sump via an overflow — either drilled bulkheads in the back of the tank or a hang-on-back overflow box using siphon principles.
2. Water passes through filtration stages in the sump — typically mechanical filtration first, then biological media, then return chamber.
3. A return pump at the sump's last chamber pumps water back up to the display tank.
4. The cycle continues — fresh filtered water enters the display, dirty water flows down to the sump.
Critical: The display tank's water level is determined by the overflow height. As water evaporates, the sump level drops; the display stays at the overflow level until the return pump runs dry.
When You Need a Sump
Sumps aren't universally beneficial. They make sense when:
You're running saltwater. Marine systems essentially require sumps for protein skimming, equipment placement, and adequate filtration. Reef tanks without sumps are extremely rare.
You have a large tank (75+ gallons). Conventional filters struggle with larger volumes; sumps handle them comfortably.
You want equipment hidden. Display tanks with no visible equipment are visually impressive but require all equipment to live somewhere — sumps handle this.
You're keeping demanding species that benefit from highly stable parameters (discus, large angels, demanding South American cichlids).
You want a refugium for natural filtration, copepod culture, or growing macroalgae.
You're building a custom system where conventional off-the-shelf filtration won't fit.
When NOT to Need a Sump
For most small to medium freshwater setups, sumps are overkill:
- Tanks under 50 gallons — conventional filtration handles these easily
- Simple community tanks — no need for advanced filtration capability
- Budget-focused builds — sumps add significant cost
- Beginners — adds complexity before fundamentals are mastered
- Renters with potential moves — sumps complicate moving setups
Sump Design Basics
A typical sump has compartments separated by baffles:
Compartment 1 - Inlet/Mechanical filtration
- Where water from the overflow enters
- First-stage filtration removes particles
- Filter socks, sponges, or filter floss
- Easy to access for regular cleaning
Compartment 2 - Biological filtration / Refugium
- Biological media (ceramic rings, bio balls, K1)
- Or a refugium with macroalgae (chaetomorpha), live rock, copepods
- Where the nitrogen cycle does its work
Compartment 3 - Equipment chamber
- Protein skimmer (saltwater)
- Heater
- Reactor (for carbon, GFO, etc.)
- Dosing pump intakes
Compartment 4 - Return chamber
- Where the return pump sits
- Water level fluctuates here as evaporation occurs
- Sometimes has an auto-top-off (ATO) sensor
Baffles between compartments serve to:
- Force water through specific zones
- Create water level differences
- Trap bubbles (especially important from skimmer output)
Setting Up a Freshwater Sump
For a typical freshwater sump on a planted or community tank:
Equipment Needed
Tank for sump — typically 20-40 gallons for a 75-gallon display. Often a basic glass tank purchased separately from the display.
Overflow — either drilled bulkhead in display (preferred) or hang-on-back overflow (uses siphon; can fail and flood floor — install carefully).
Plumbing — PVC pipes connecting display to sump and back. 1" diameter for typical setups; bulkhead fittings sized accordingly.
Return pump — flow rate matched to overflow capacity. Typical: 600-1000 GPH for a 75-gallon system. Submersible (in sump) or external.
Baffles — glass or acrylic dividers separating sump chambers. Often custom cut.
Filter media — filter socks/sponges for mechanical, bio media for biological.
Lighting (if running refugium) — modest plant light for the macroalgae section.
Setup Process
1. Plan the layout. Sketch your sump compartments. Account for media containers, equipment placement.
2. Install baffles in the sump tank, sealed with aquarium silicone. Let cure before water testing.
3. Drill the display tank (or install hang-on overflow). Bulkheads sized to your plumbing.
4. Run plumbing from display drain to sump inlet, and from sump return pump back to display. Use unions for serviceability.
5. Test water tightness before stocking — fill the system with water, run for hours, watch for leaks.
6. Configure flow rates — too fast and the sump won't be effective; too slow and circulation suffers.
7. Add filter media in appropriate compartments.
8. Cycle the system — same as any new tank, treating display + sump as the same system.
Avoiding Common Sump Mistakes
Inadequate overflow capacity. Drain capacity must exceed return pump output, or water backs up in the display and overflows.
No backup plan for power outages. When power cuts, water can siphon back into the sump and overflow it. Use anti-siphon holes or check valves.
Wrong sump size. Too small can't accommodate equipment or extra capacity benefits. Too large requires extra plumbing planning.
Forgetting evaporation. Sump water level drops as water evaporates; eventually the return pump runs dry. Install auto-top-off (ATO) systems or check daily.
Poor baffle sealing. Silicone needs to fully cure; baffle leaks cause flow problems.
Inadequate bubble traps. Microbubbles from skimmers or pumps end up in the display — annoying and visually ugly.
Loud return pump. Vibration through stand can be annoying. Quality submersible pumps are quieter.
Hang-On Overflows vs. Drilled Tanks
Drilled tank (bulkhead fittings):
- Permanent, reliable
- Can't drain below bulkhead height (set water level)
- Requires tempered glass detection (tempered glass can't be drilled)
- More work to install initially
Hang-on-back overflow:
- No drilling required
- Uses siphon principle to drain water
- Can lose siphon if power outage or air gets in — floods floor
- Generally not recommended for serious setups
- Workable for temporary or rental situations
If you're committed to a sump, drill the tank. The reliability difference is significant.
Sump Sizing
A rough guide:
Display tank size → minimum sump size:
- 40-gallon display → 15-20 gallon sump (if needed at all)
- 75-gallon display → 20-30 gallon sump
- 120-gallon display → 30-40 gallon sump
- 180+ gallon display → 40-75 gallon sump
The sump should be at least 25-30% of display volume — gives meaningful water volume increase and adequate space for equipment.
Cost Reality
A typical freshwater sump setup:
- Sump tank: $50-150 (basic glass tank)
- Baffles and silicone: $20-30
- Drilling/bulkheads: $50-100 (or $50-100 for hang-on overflow)
- PVC plumbing: $50-100
- Return pump: $100-200
- Filter media: $50-100
- Misc fittings: $30-50
Total: $350-700 for a basic functional freshwater sump.
Saltwater sumps add $200-500 for the protein skimmer plus additional equipment.
Refugium Section
A popular sump feature: a refugium — a chamber growing macroalgae and supporting copepods.
Purpose:
- Macroalgae (chaetomorpha, caulerpa) absorb nitrates, phosphates
- Creates copepod populations that feed fish
- Provides backup ecosystem
- More natural filtration
Setup:
- Compartment with light (modest LED)
- Macroalgae (chaeto most common)
- Some keepers add live rock rubble or sand bed
- Run reverse photoperiod to display (off when display is on) — keeps pH more stable across 24 hours
Result: Reduced nitrates, healthier system, additional fish food.
Refugiums are particularly popular in saltwater but work in freshwater too.
Long-Term Maintenance
Sump-equipped systems require:
Weekly:
- Check sump water level
- Inspect overflow function
- Replace filter socks/sponges (mechanical media gets dirty fast)
- General visual inspection
Monthly:
- Clean return pump intake
- Inspect baffle seals
- Replace chemical media (carbon, GFO) if used
- Trim refugium macroalgae if present
Annually:
- Replace silicone seals if showing wear
- Deep clean sump and plumbing
- Replace any worn components
Despite the equipment list, sump maintenance is often easier than a conventional canister filter — everything's accessible without disconnecting tubing.
The Bottom Line
Sumps are external filtration/equipment tanks that handle filtration, hide equipment, expand water volume, and enable advanced equipment use — essential for saltwater systems, valuable for large freshwater tanks (75+ gallons), and unnecessary for most small to medium setups. Typical design: 20-40 gallon tank with baffled compartments (mechanical filter zone, biological/refugium, equipment chamber, return pump chamber). Setup requires drilled display tank (preferred) or hang-on overflow (riskier), PVC plumbing, return pump matched to overflow capacity, and appropriate filter media. Cost runs $350-700 for basic freshwater, more for saltwater with protein skimmer. Common mistakes: inadequate overflow capacity, no backup for power outages, wrong size selection. Long-term maintenance is actually simpler than conventional filters in many ways — everything accessible without disconnecting tubing. Skip sumps for small simple tanks; embrace them when scale or species demand serious filtration capability. For saltwater, they're essentially required; for serious freshwater builds, they're transformative.
Related guides
- Choosing the right filter: HOB vs sponge vs canister
- Filter media explained: mechanical, biological, chemical
- Introduction to saltwater aquariums
- How many fish can my tank hold?
- Setting up the stand: levelling and weight safety
- Advanced aquarium topics
- What equipment do you actually need vs store upsells
- How much does a fish tank cost to set up and run?
Got questions about your specific setup? Drop them in our Community Forum — we love helping new fishkeepers get started right.